Monday 26 November 2012

Rear Brake Cylinder (Day 100)

I am trying to get the rear brake cylinder apart now but I am not having much luck. 

Click on picture to enlarge:


Wednesday 21 November 2012

New Intake Boots Ordered

I found a great Ebay Shop that sells some Suzuki spares at really good prices even when you add the shipping to the UK. So I have treated myself to a new set of boots.
 
You can find them here:  Everett Powersports, Washington, USAI got this little lot for £100.

Saturday 17 November 2012

Starter Idle Gears (Day 91)

I originally started this blog in order to make a photographic catalogue of the parts of the bike as it was being dismantled.  This was in order that I would know how to put them back together again.  Sometimes the blog gets hijacked by my desire to verbalise the whole process and turn it into a drama.  In order to set it back on it's originally intended course, I now include some parts photos.
 The starter idle gear.  Transfers the power from the starter motor (top right cog) through the idle gear (middle) to the starter fly gear (teeth to the left).
 Nearly lost this washer on the back (is it a thrust washer).  I heard a tinkling sound as I pulled the gear off then I found the beast stuck behind the big starter clutch cog.

Engine Clean Preparation (Day 91)

After 91 days on the job, I am now going to start moving from dismantling to whatever comes next (which I don't really know what it is).  I really want to get the engine cleaned up and inside so I can work on it over some of the colder darker winter nights.  First job then is to clean it off.
 
I haven't got a pressure washer, I might rent one for a day but in any case the engine will need to be made water proof if I am to wash it (they don't tell you any of this anywhere!).  This means putting the stator cover back on, closing off the carb intakes, closing off the exhausts, putting back the rocker cover breather plate and checking for other ways of water ingress.
 
As part of this exercise I thought I ought to get the starter motor out as I didn't want to drown that. Ha!. When you take the starter motor out there are 2 more holes into the engine.
 This one where the starter drive goes into the stator housing to turn the starter flywheel and

this one that appears directly underneath the starter motor.  I pulled this little pipe out (it was just sitting in the hole) and looked inside.  Not being an expert with this engine yet but I would say I was looking directly into the gear box.  I could see cogs and oil and things.  Can there really be an unprotected hole on the top of the engine that would allow water and other contaminents inside?  I am very puzzled.  To be safe I put the starter motor back in.  I also found that it was a sealed unit so it should survive being washed and doused in water.

So next up was to seal the carb intakes.  I decided to cut up some rubber gloves and bolt them across the intakes using the engine / carb boots to hold them.  I left the wadding in the intakes as well to soak up any water that might get past.

No yet worked out a method on sealing the exhaust ports. I will do some more research.


Engine Photos (Day 91)

A quick round up of engine photos now that it is out and can be examined in detail.  Some parts of it a pretty corroded. (click on photos to enlarge).

Very bad corrosion on the rear top part of the engine casing.


 Quite a bit of corrosion on the front as well.  I hope this comes off.


 Here's the pesky shaft drive coupling.
Oh and this was what I hacksawed off to get the engine out of the frame.  Now I can see there is a cross headed screw holding the assembly onto the head.  It was too dark to see this the other night.

Tuesday 13 November 2012

Engine Removal part 2 (Day 85)

Here is a bit more of the technical explanation of how I got the engine out.  (The video of the whole affair is here:  Engine Removal Video in a previous post).

Actually saying that this is a technical explanation is really a lie.  There was nothing really technical about what we did.  Brute force, a hacksaw and plenty of help is what is needed.

Let me first show you what we were supposed to do (in reverse order of course).  All well and good if you have the engine hoist, a scissor platform jack and a car axle jack just lying around.  That's about £1,000 worth of equipment in my neck of the woods.  But I did have a laugh when I saw these photos.  This is USA vs Rest of the World analogy.  You guys (from the USA) have so much (just look at the amount of land there is surrounding this engine!) you don't even know you are alive!  We are paying $8.39 per US gallon of gas compared to the $3.15 or so that you pay.  Nearly 3 times your amount.  So look at the equipment here:


 Nice looking engine BTW.
The workshop manual is not much help (click on the photo to enlarge) saying simply:  "gradually lift up engine and lower".  Don't try this at home children.
 
I eventually got the shaft drive off the engine (see previous post).  Then we put the rear swing arm back on so we could wheel it into the garden.  It was a tough job because both the tyres are flat and the front wheel is virtually seized.
 
We layed it down on the grass.  Then I removed the last bolts.  Then we discovered that I had not disconected the tacho cable.  I tried getting it off with a clamp wrench not realising that I needed to remove a cross headed screw first.  By now it was dark and I couldn't see it.  And if the truth was known, I had not consulted to the workshop manual about this.

 With all the bolts removed, we shook and pried at the engine.  But it would still not come out.  With 3 of us lifting the frame (complete with forks and rear swing arm) we were rapidly running out of energy.  I took off the swing arm again to make it lighter.  And finally...


Monday 12 November 2012

Disconnecting the Shaft Drive (Day 85)

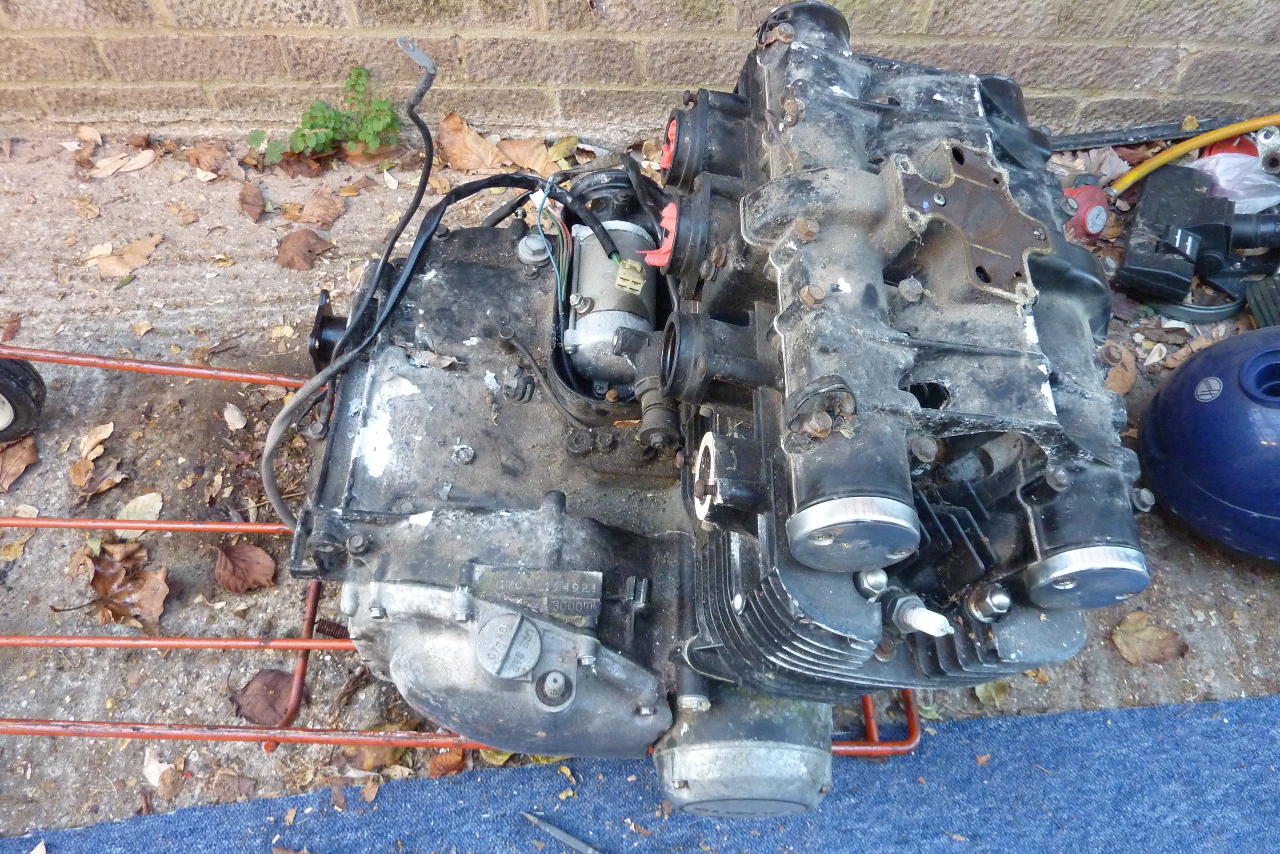
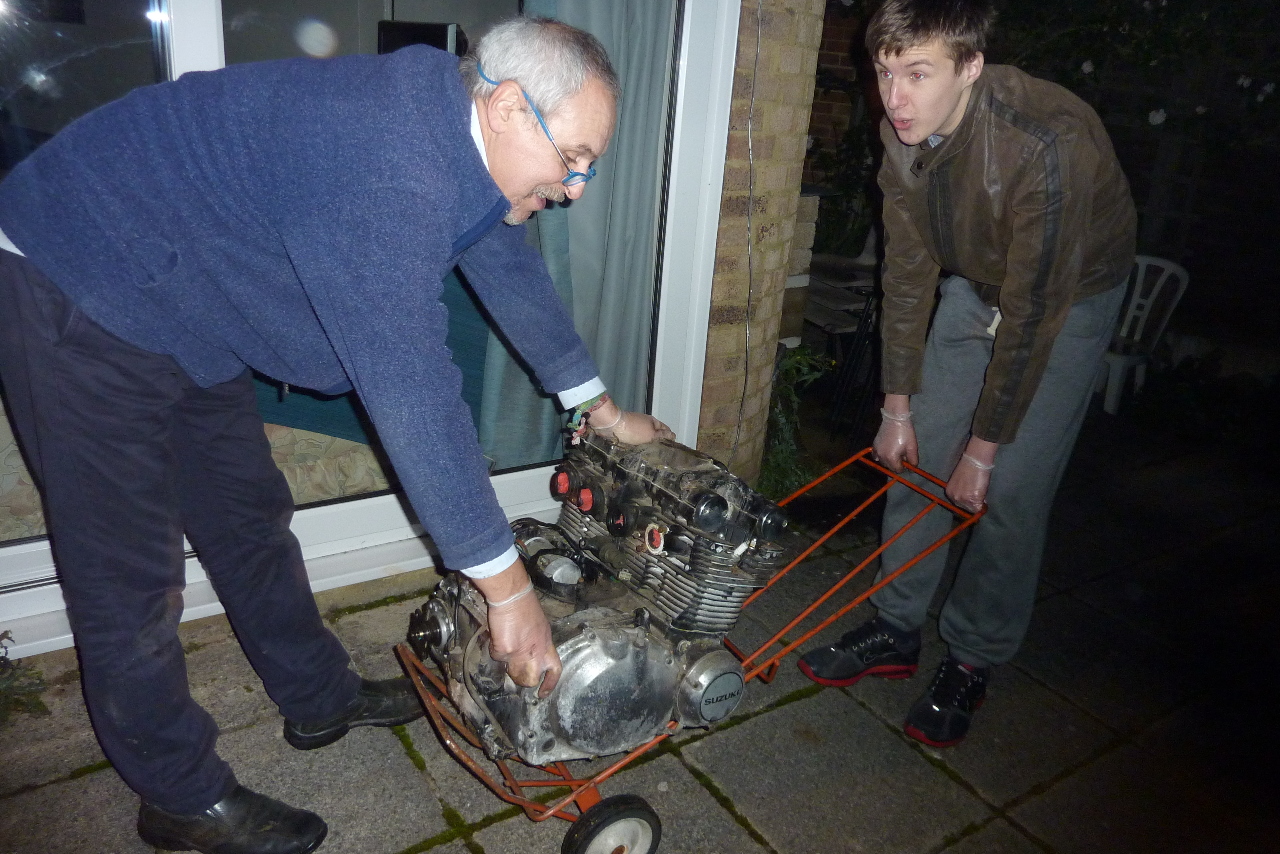
So on day 84 I was getting stuck as to how to get the shaft drive off the engine so that it would allow the engine to be removed.  See posting for Day 84.  I do have a Clymer Manual (which generously says "remove bolts securing drive shaft flange" and nothing else).  I do have a brain too and have worked on bikes many years when I was younger.  But I could not see a way to do this. (click photos to enlarge).

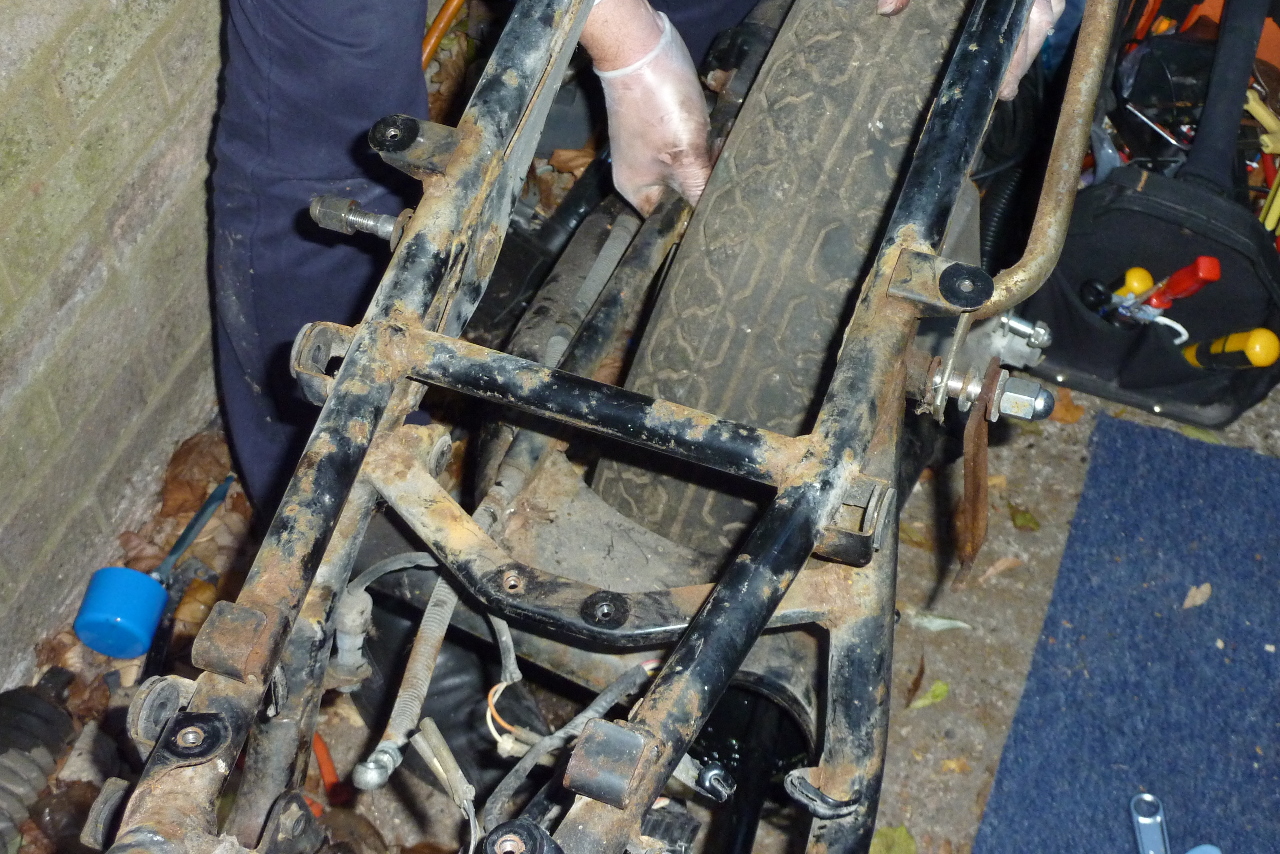
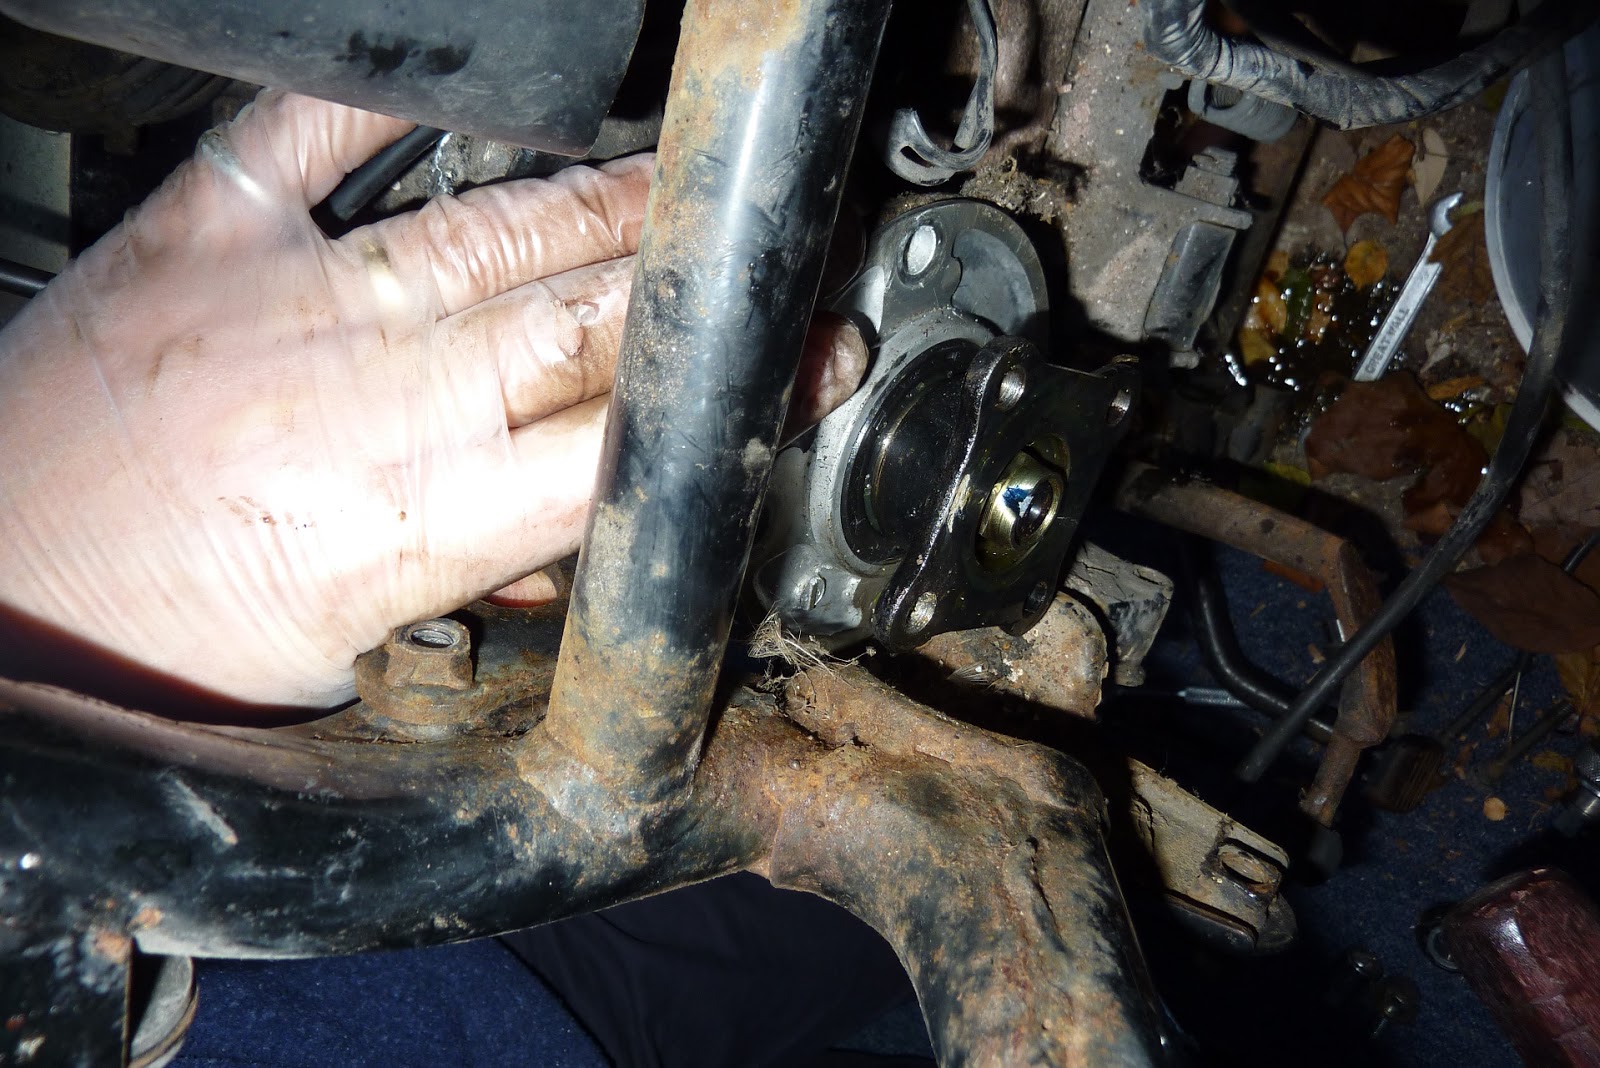
I decided to remove the swing arm (which contains the drive shaft) and see what that would do for me.  I had not realised that at the wheel hub end the drive shaft was simply "splined" into the drive hub of the wheel.  So the drive shaft was free but still attached to the engine.
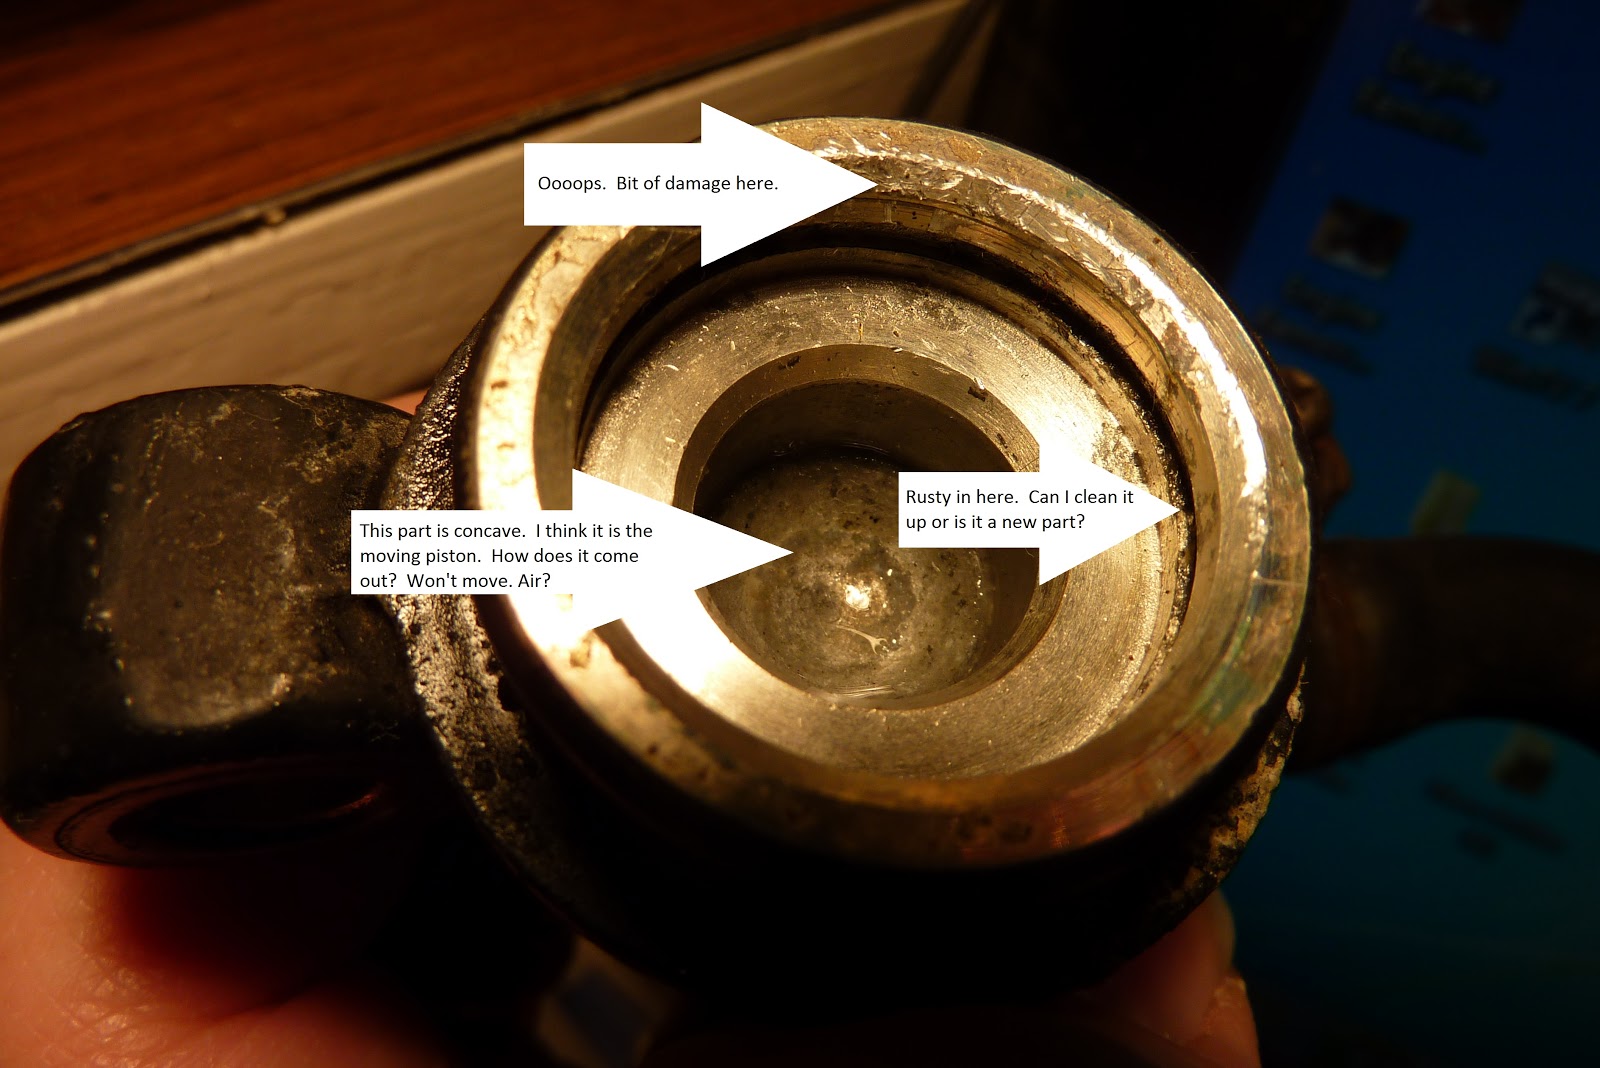
So OK the shaft is hanging free, I can get the rubber boot off and I can easily access all the bolts.  So now lets try getting the bolts off the shaft at the engine end just north of the universal joint.  Get the spanner on nicely and try and turn it.  The shaft and the engine just goes round!  Of course.  There has been advice at this point to put the engine in gear and try that.  But with no rear wheel and the brake being removed (it was seized in any case) this was not an option either.
 
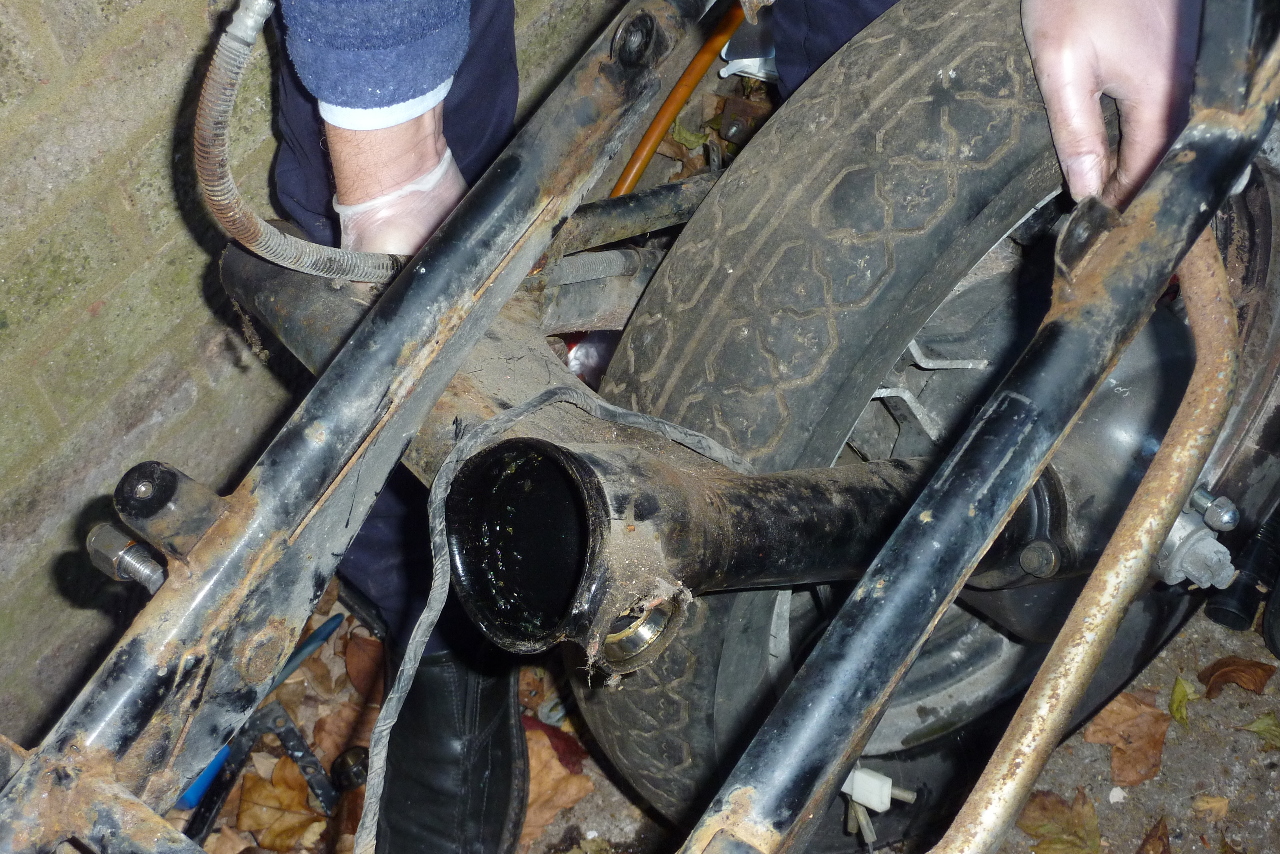
I know what to do, I will remove the silver bolts that go into the engine and see if that will get the shaft off.

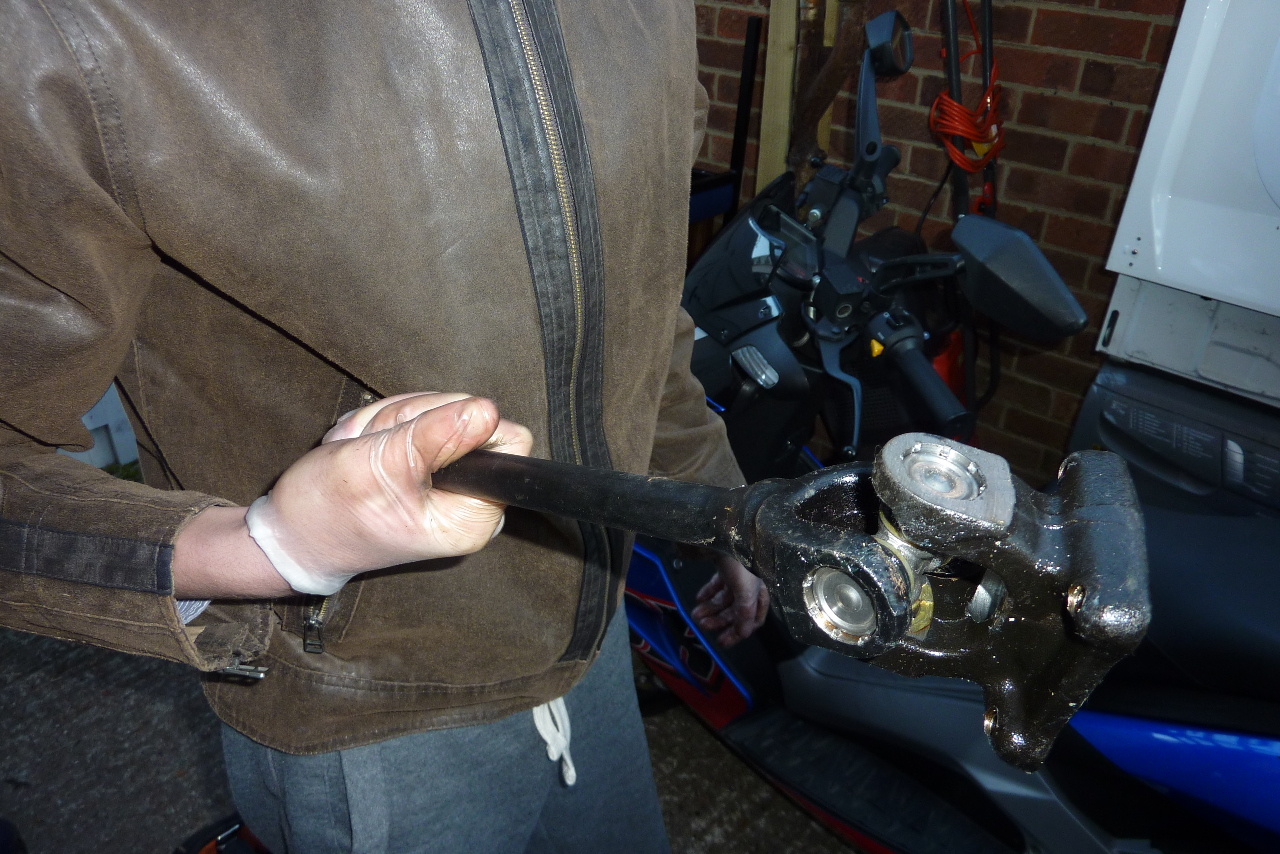
These are much easier to get off because this part of the shaft assembly does not turn.  These bolts go into the engine casing and are fixed so they come out with anything spinning.  That'll do it.  Except this in not actually part of the shaft, it is the shaft housing.  Never the less it does come out.
 Here she comes.  This might work.  Or not......
No it won't.  Nearly out.  Then it hits the frame right here.
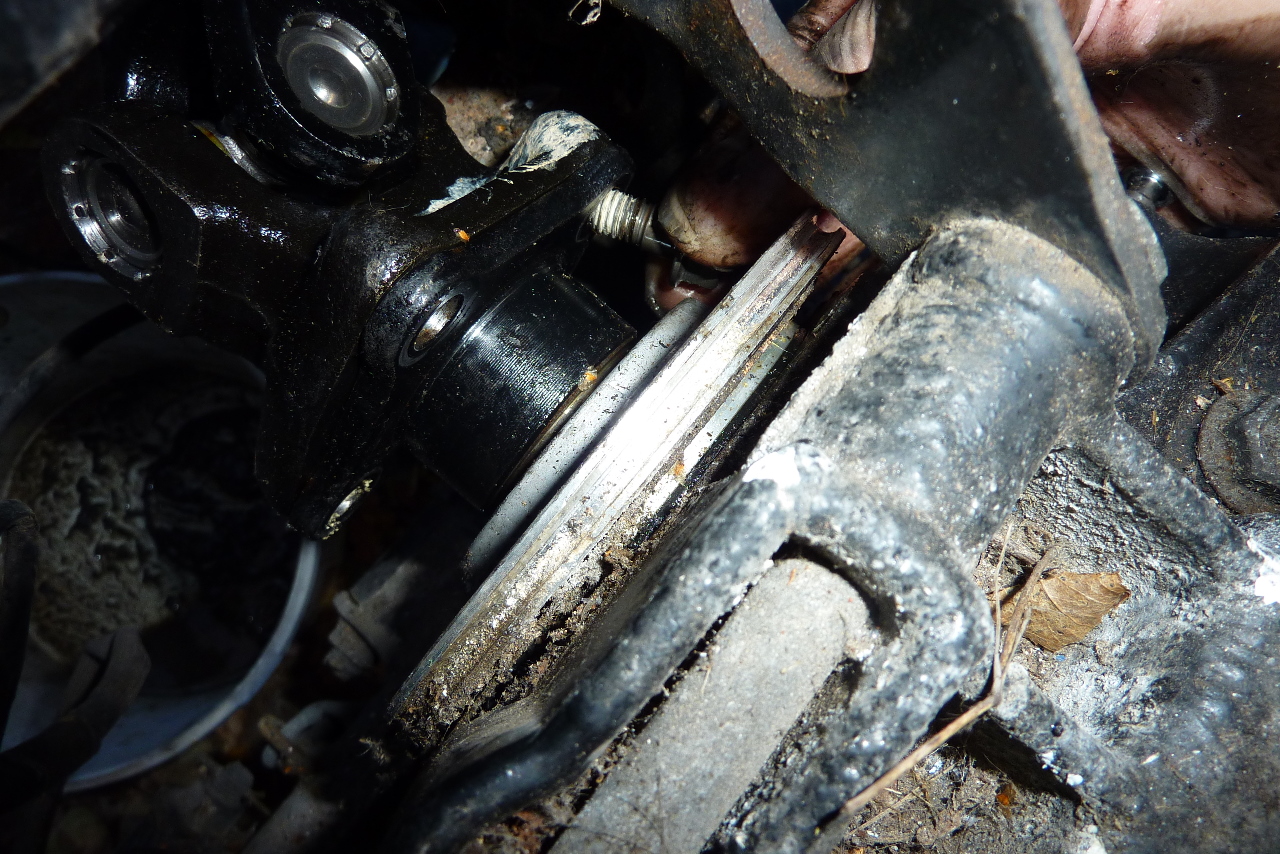
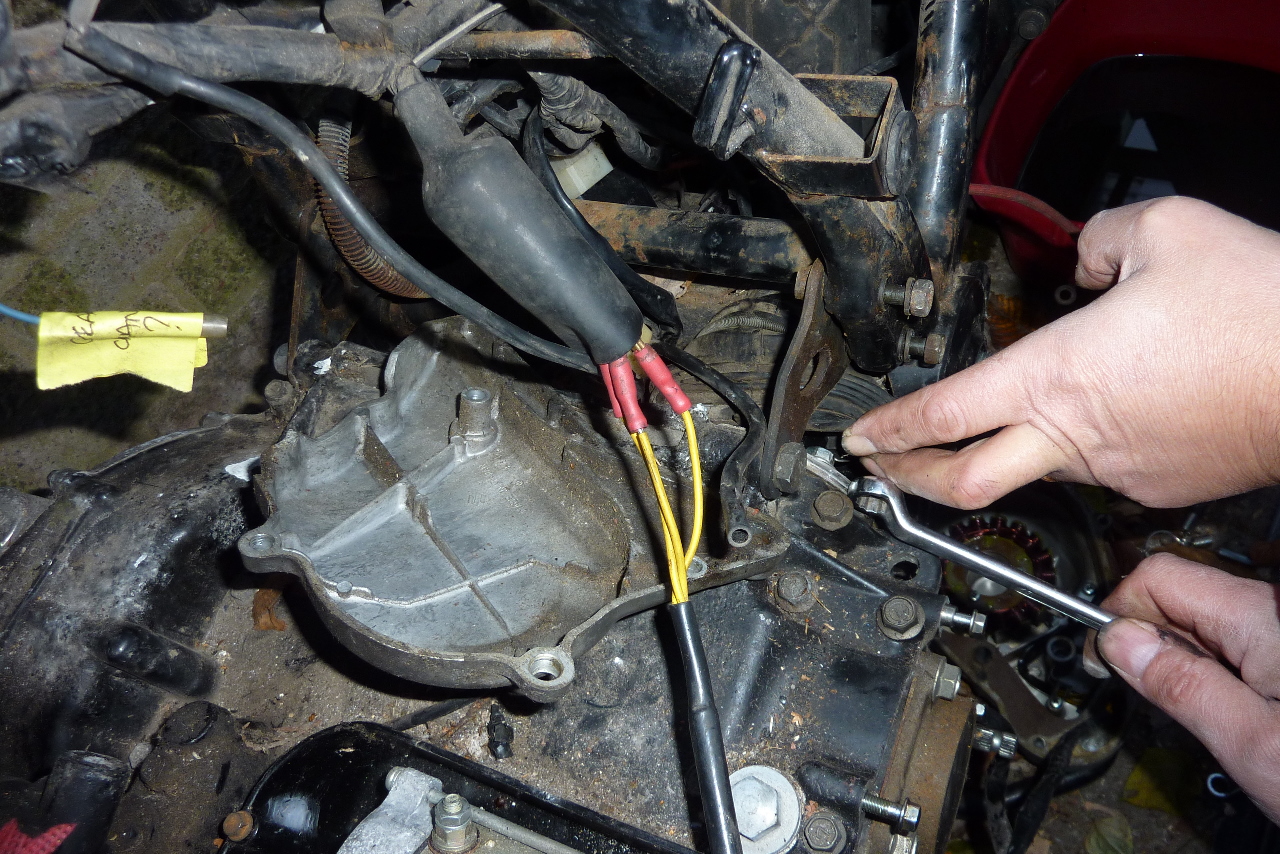
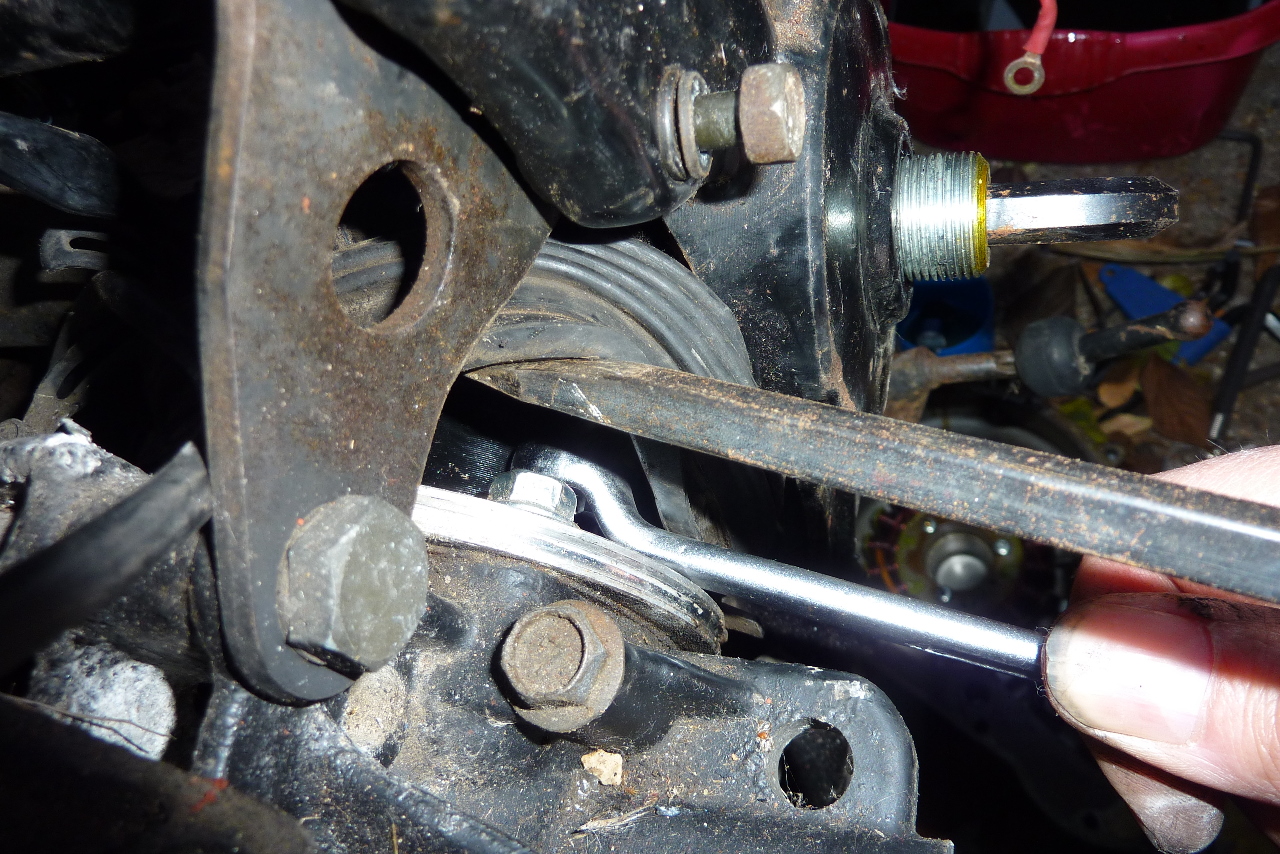
This wasn't going to work either.  So we pushed that piece back in and had another go at getting the other bolts out again (the ones connected to the universal joint that I was trying before).  The problem was; how to stop the shaft turning in order for the bolt to come undone.  I finally sussed it by getting a spanner across 2 of the nut heads, then turning the nut you want to undo with a ring spanner and when the shaft turns, the opened ended spanner being held across the 2 other nuts will hit the frame.  This provides the leverage.  We were able to get all the nuts loose and eventually off.
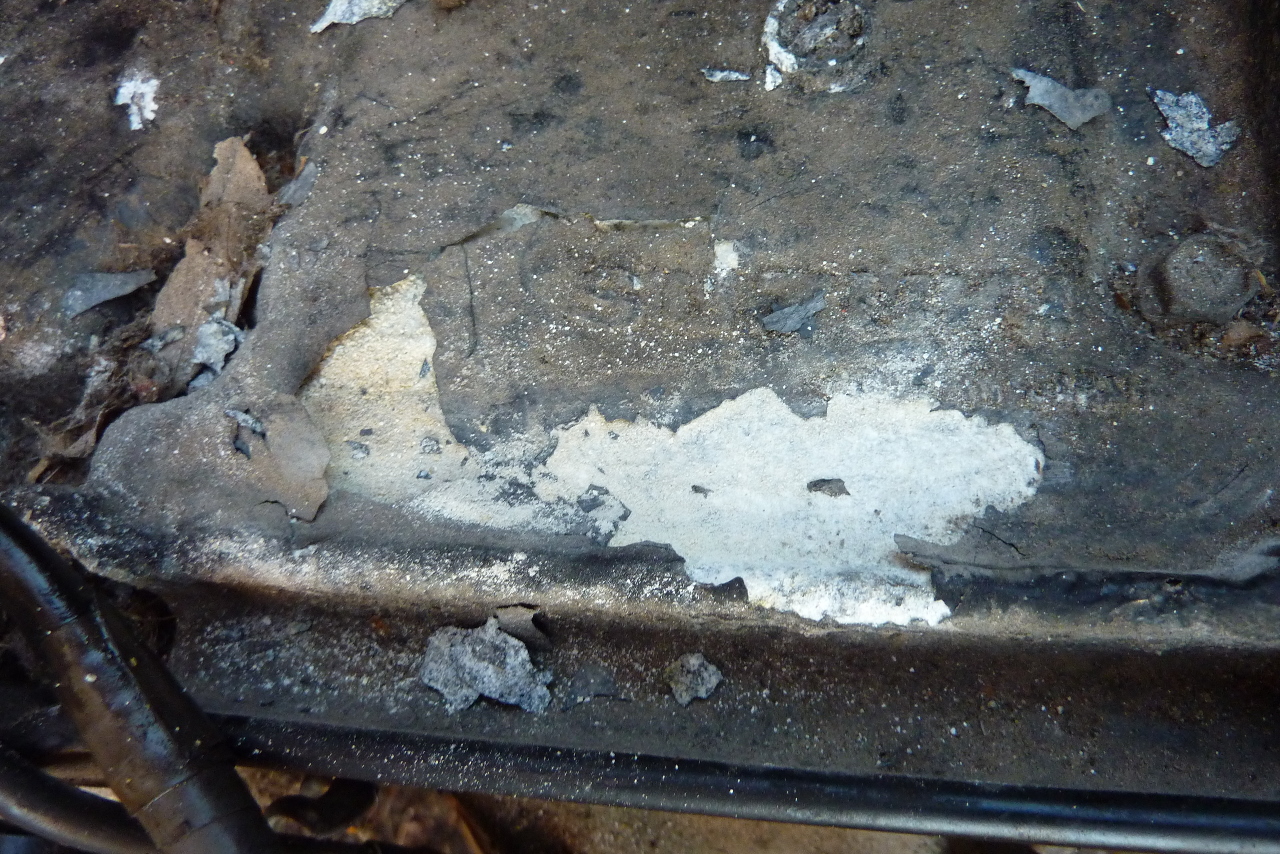
 On this photo above you can just see the 2 spanners at work (click photo to enlarge).  This set up did not work.  I had to lay the open ended spanner across 2 nut heads and jam it against the frame.  This provided enough leverage to crack the nuts (get the first movement) then it was reasonably easy although at no stage could you turn them with your fingers.  This is probably due to the bolt cement they use to stop them coming loose.
 The nuts are coming off.
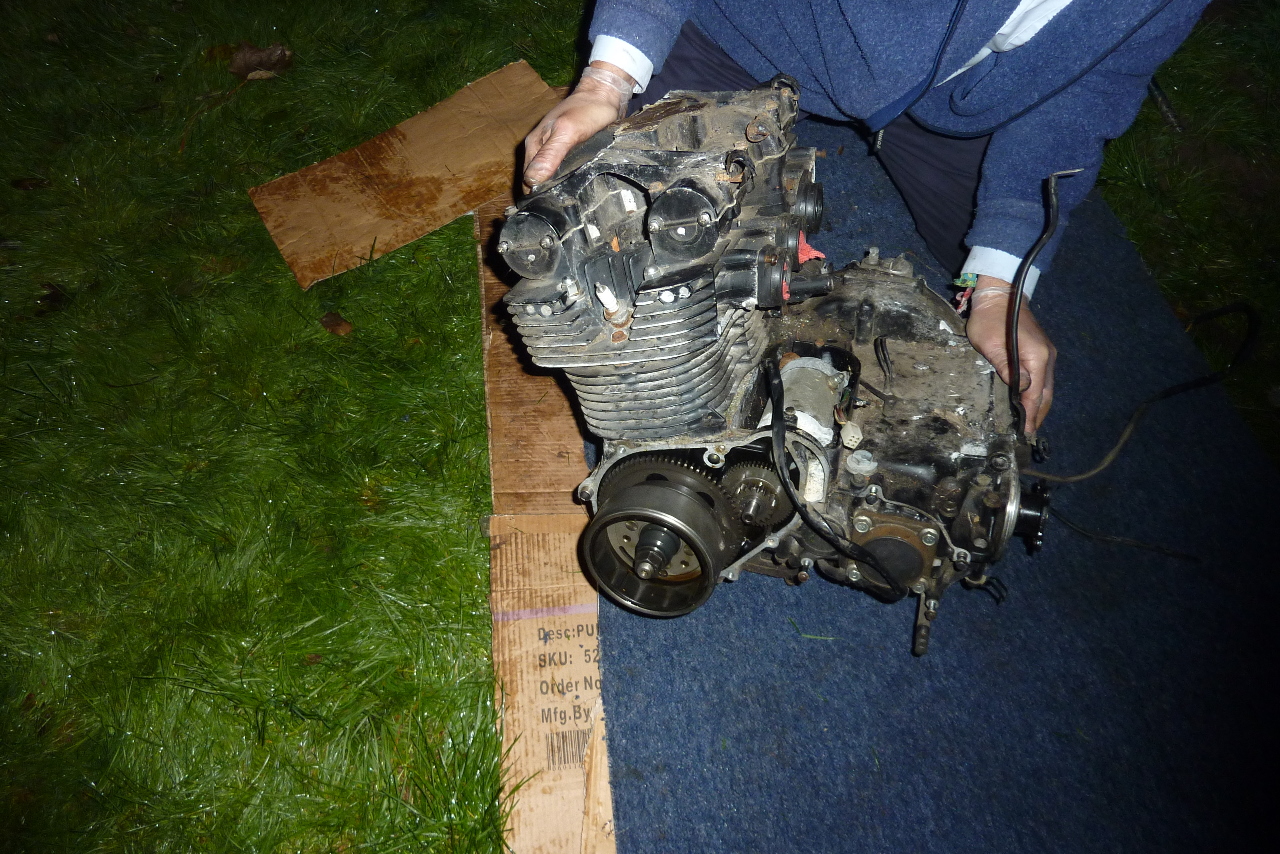
 And we are free.
 Now back to engine removal.


Sunday 11 November 2012

Engine Removal (Day 85)

It was a big day for us today.  We finally got the engine out.  Don't let anyone tell you that this job is going to be easy.  It was a pig.  And even after getting all the bolts and plates out it still does not fall out of the frame.  There were 3 of us on this and the frame with the wheels attached was still too heavy so I ended up taking the rear swing arm off again when it was on it's side.  Because we were in a hurry (we were losing light) I reverted to using a hacksaw to cut off the tacho cable which would not come off with a wrench.  In the end the final moment of the engine coming free was lost on video as it was too dark but we got some shots which are at the end of the video.

Saturday 10 November 2012

Shaft Drive and Engine Removal (Day 84)

I am pretty sure that the shaft drive has to be unbolted from the engine in order to get the engine out but I can't figure out how to do this.  The bolts are under a big rubber boot that cannot be slid very far forwards or backwards (click on photos to enlarge).
 
Here's the rubber boot.
 And this is how difficult it is to get in there.
 I don't think I can disconnect the shaft from the engine with the silver bolts (which screws into the engine side) but I need to unscrew the gold coloured ones that are pointing to the rear of the bike.  How on earth do you do that?
You can see on this one that I have an allen key in the swing arm bolt.  I am thinking that that is the only way to do it by taking the rear wheel and swingarm off first.  But I want to keep the bike in rolling chassis form so I can wheel it to the place in the garden where I will put it on it's side to get the engine out.